How To Water Plants Correctly: Essential Proper Plant Watering Techniques for Healthy Growth
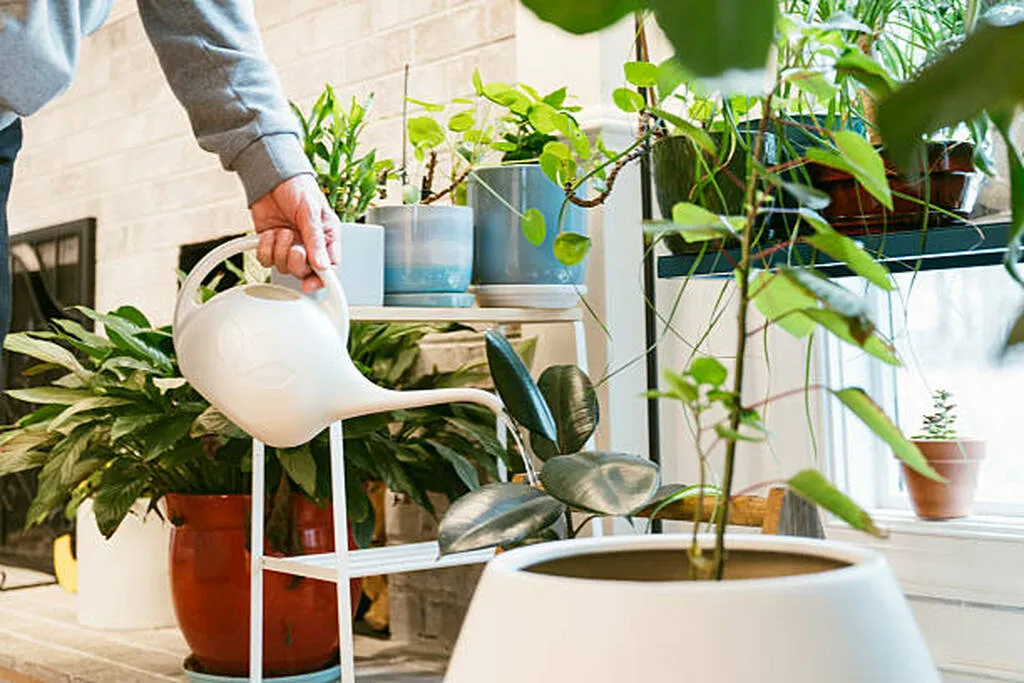
Proper plant watering means matching frequency and volume to a plant’s needs to promote healthy roots, reduce disease, and conserve water. This guide explains practical watering techniques—from checking soil moisture with simple tests to selecting water-wise systems like drip irrigation—and ties each method to root health and landscape goals. Many gardeners struggle with overwatering or under-watering because schedules are based on calendars instead of soil moisture, and that mismatch often causes root rot, nutrient leaching, or stunted growth. This article provides clear rules of thumb for different plant categories, step-by-step deep-watering and shallow-watering methods, troubleshooting for overwatered plants, and practical setup advice for residential drip systems. You will learn how to use finger tests and moisture meters, compare deep versus shallow watering with recommended approaches, and apply water-conservation tactics suited for hot climates. Throughout, keywords like plant watering, deep watering, drip irrigation, soil moisture, and watering schedule are used to connect practical steps to measurable outcomes and to help you build an efficient routine that supports healthy growth.
How Often Should You Water Plants? Understanding Watering Frequency for Different Plant Types
Watering frequency depends on plant type, pot or in-ground location, and soil moisture rather than a fixed calendar schedule; the rule of thumb is to water when the top 1–3 inches of soil are dry for most plants because this indicates the root zone needs replenishment. Evaluating soil moisture with a finger test or meter lets you match watering to evapotranspiration rates and plant water use, which conserves water and prevents root stress. Different plant categories need different approaches: shallow, frequent moisture for seedlings and many vegetables; moderate, regular watering for typical houseplants; and less frequent, deep-soak cycles for succulents and established trees. Environmental modifiers like temperature, wind, humidity, and season change how quickly soil dries, so adjust frequency gradually and document outcomes to refine your watering schedule over time.
Different plant types show distinct watering needs and cues; the table below compares common categories with practical watering frequency and pot vs. ground guidance.
| Plant Type | Watering Frequency Cue | Pot vs. In-Ground Note |
|---|---|---|
| Houseplant | Top 1–2 inches dry | Pots dry faster; prefer a well-draining mix |
| Vegetables | Keep soil evenly moist 1–2 inches | In-ground retains moisture longer than small containers |
| Succulents | Allow top 2–3 inches to dry between waterings | Containers need much less frequent watering than ground |
| Trees/Shrubs | Deep soak when top 3 inches dry | In-ground root zones are deep; less frequent, deeper waterings work best |
This comparison clarifies how pot size, soil, and species determine frequency and helps you set a baseline watering schedule.
Practical rules-of-thumb for checking and scheduling watering include simple tests and seasonal adjustments that help you avoid common mistakes.
- Check soil with your finger: water when the top 1–3 inches feel dry depending on plant type.
- Weigh pots: a light pot indicates dryness and need for watering; a heavy pot indicates adequate moisture.
- Adjust seasonally: water less in cool, wet seasons and increase frequency during hot, dry spells.
These rules help translate moisture readings into predictable action. By monitoring and adjusting, you create a responsive watering schedule that protects roots and conserves water.
For homeowners in Poway and the San Diego region, local microclimate factors—like coastal influence, summer heat, and seasonal rainfall—affect drying rates and plant selections. Consider consulting a local expert to tailor irrigation schedules and system selection to your landscape and water-cost goals. Northwest Landscape Supply can provide regional guidance and recommendations for your landscaping and irrigation needs.
What Factors Influence How Often to Water Plants?
Several key factors drive watering frequency: soil texture, pot or bed depth, plant size and age, sunlight and wind exposure, and seasonal temperature shifts. Sandy soils drain quickly and often require more frequent, smaller waterings, while clay soils hold moisture longer but need careful aeration to prevent waterlogging. Container plants dry out faster because less soil volume holds moisture and more surface area is exposed to air, which increases evapotranspiration. Young plants with undeveloped root systems need more consistent moisture than established specimens since shallow roots cannot access deeper water. Understanding these variables lets you set a baseline schedule and then adjust using moisture checks and observation of plant performance.
Lasting schedule changes should always be validated with moisture checks rather than by clock alone, which leads into practical adjustments for indoor and outdoor settings.
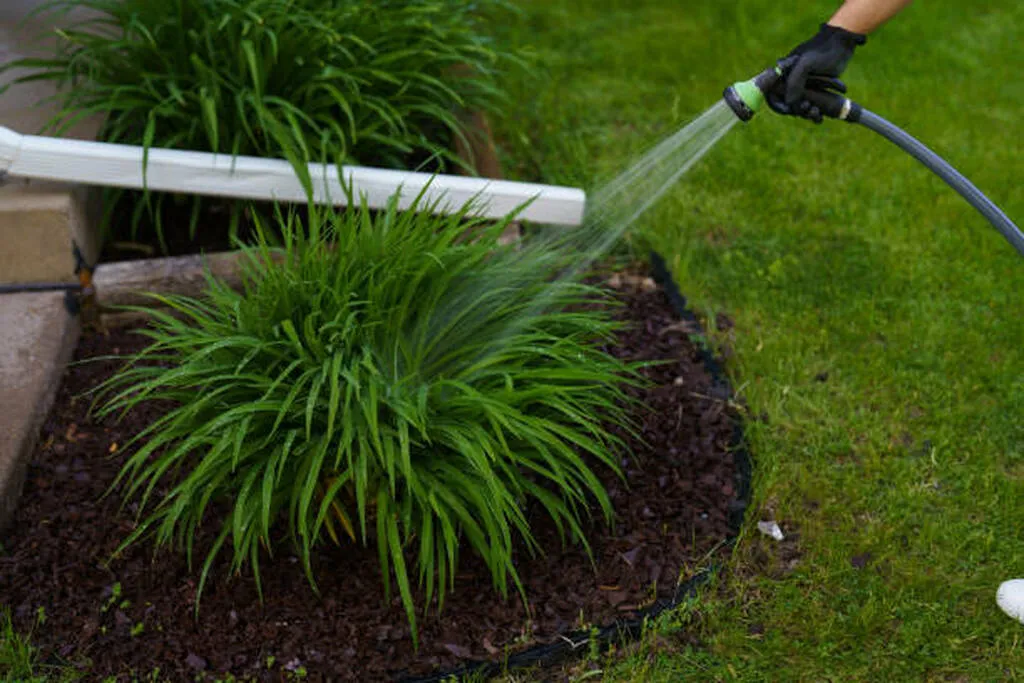
How to Adjust Watering Schedules for Indoor vs. Outdoor Plants
Indoor plants often require less frequent watering because indoor air is typically cooler and humidity is more stable, but poor drainage and low light can mask overwatering, so check soil before adding water. Outdoor plants face variable sunlight, wind, and temperature swings that can increase transpiration dramatically; in hot, dry periods water early in the morning to reduce evaporation and leaf disease. Containers placed outdoors may require daily checks in midsummer, while similar species planted in-ground need fewer but deeper waterings. Transitioning between seasons or moving plants between indoor and outdoor locations requires a week or two of close monitoring to avoid shock and incorrectly timed irrigation.
Transitioning schedules between indoor and outdoor environments highlights the need for tools to verify moisture reliably, described later in the soil moisture section.
What Are the Signs of Overwatering Plants and How Can You Prevent It?
Overwatering harms plants by depriving roots of oxygen, promoting root rot, and encouraging pests and fungal growth; key signs include yellowing leaves, soft or mushy stems, and a sour or rotten smell from the soil. Recognizing these symptoms early allows you to stop watering, improve drainage, and take corrective steps before root systems decline irreversibly. Overwatering typically occurs when watering schedules ignore soil moisture; adjusting to moisture-based cues and improving drainage reduces recurring problems. Early intervention can often save plants with targeted drying, repotting into fresh, well-draining mix, and trimming necrotic roots to restore healthy growth patterns.
Common visual and sensory symptoms provide quick diagnostics so you can act decisively.
- Yellowing or dropping leaves despite wet soil surface.
- Soft, brown, or mushy stems and leaves that feel limp.
- Foul or sour odor from the potting mix indicating anaerobic conditions.
These signs indicate root stress and often root rot; correcting drainage and pausing watering is the first step. Preventing overwatering centers on monitoring soil moisture and ensuring adequate drainage, which is explored in remediation steps below.
How to Identify Common Symptoms of Overwatering
Inspect plants visually and by touch to diagnose overwatering: lift pots to assess weight, probe soil for moisture depth, and gently remove a plant to inspect roots if necessary. Healthy roots are firm and white, while overwatered roots are brown, soft, and may slough away when touched; such roots cannot transport water or nutrients effectively. Surface mold growth and insect activity can also indicate prolonged wetness and organic breakdown in the soil, which further endangers root health. Combining sensory checks (smell, weight, texture) with visual cues gives a reliable diagnosis that guides remedial action.
What Are Effective Solutions to Fix Overwatered Plants?
Start by stopping further watering and improving airflow around the plant to encourage surface drying; move potted plants into brighter, drier spots and remove saucers that trap water. If symptoms persist, gently remove the plant from its container, rinse and inspect roots, and trim away clearly rotted tissue with sterilized tools before repotting into a fresh, aerated mix that includes perlite or coarse sand. For in-ground plants, improve drainage with soil amendments and shallow trenching if water pools; consider a temporary elevation or berm to divert standing water. Rehabilitated plants benefit from reduced watering frequency and close monitoring with moisture checks until roots re-establish.
Remediation preserves plant health and leads naturally into techniques that strengthen root systems, such as deep watering and managed drought conditioning.
What Is Deep Watering and How Does It Benefit Plant Root Health?
Deep watering is the practice of applying water slowly and thoroughly so that moisture penetrates into the root zone rather than wetting only the surface; this encourages roots to grow deeper, improving drought resilience and nutrient uptake. The mechanism is simple: deeper soil moisture reduces frequent surface wetting, which discourages shallow root development and helps plants access stable water reserves during dry periods. Benefits include stronger anchorage, improved access to nutrients that leach downward, and reduced irrigation frequency over time, which saves water and stabilizes plant growth. Deep watering is especially appropriate for trees, shrubs, and established perennials, while shallow, frequent water is better for seedlings and surface-rooted species.
Below is a comparison table summarizing deep vs. shallow watering attributes and recommended approaches.
| Approach | Depth Reached | Frequency | Benefits |
|---|---|---|---|
| Deep Watering | 6–18 inches (root zone) | Less frequent, longer duration | Promotes deep root growth and drought resilience |
| Shallow Watering | Top 1–3 inches | More frequent, short duration | Suited for seedlings and surface-rooted plants |
| Targeted Soak | Varies by plant | As-needed | Balances deep moisture with surface needs for mixed beds |
This comparison helps decide which technique fits each plant stage and soil type, guiding practical application in landscapes.
How to Perform Deep Watering Correctly for Strong Root Development
To perform deep watering, apply water slowly using a soaker hose, slow drip, or a hose with a gentle trickle directly at the base of the plant until the soil is moist to the root depth; timing depends on soil texture and emitter flow but typically ranges from 30 minutes to several hours for large trees with soaker lines. Test penetration by probing with a screwdriver or soil probe to ensure moisture reaches the intended depth, and pause when excess runoff begins to avoid waste. For new plantings, repeat deep soaks at more frequent intervals initially to establish roots, then transition to longer intervals that encourage downward root growth. Consistent deep watering over months strengthens root systems and reduces stress during hot, dry periods.
When to Use Shallow Watering vs. Deep Watering Techniques
Shallow watering suits seeds, cuttings, and seedlings because their roots occupy the upper soil layer and require consistent surface moisture for germination and early growth. Conversely, deep watering benefits established shrubs, trees, and drought-conditioning programs by encouraging roots to forage deeper and access stable moisture reserves. In mixed planting beds, use a hybrid approach: shallow, frequent watering for young transplants and targeted deep soaks for mature specimens, or divide beds into irrigation zones that match root depth. Seasonal timing matters too—shallow watering supports spring establishment while deep watering prepares plants for summer droughts.
Choosing the correct technique depends on root depth, plant age, and long-term landscape goals, which informs irrigation system design.
How Does Drip Irrigation Work for Gardens? Efficient Watering Systems Explained
Drip irrigation delivers water directly to the root zone through emitters at low pressure and low flow rates, reducing evaporation and runoff while supplying plants with targeted moisture; this method conserves water and promotes healthier root systems because water is applied where roots can absorb it most efficiently. The mechanism involves a network of mainline tubing, laterals, and emitters that meter flow to individual plants or zones, allowing tailored schedules for different plant groups. Benefits include measurable water savings, reduced weed pressure because surface soil stays drier, and improved fertilizer use efficiency when applied through the system. Drip is flexible for container gardens, garden beds, and mixed landscapes and pairs well with smart controllers to optimize run times.
The table below explains common drip system components, their functions, and typical recommendations for residential setups.
| Component | Function | Typical Recommendation |
|---|---|---|
| Controller | Schedules valves and runs | Use programmable controllers with seasonal adjust |
| Mainline Tubing | Delivers water from source | 1/2″ or 3/4″ tubing for zones, UV-rated for exposure |
| Emitters | Meter water to plants | 0.5–4 GPH emitters based on plant needs |
| Valve/Backflow | Controls water on/off and safety | Include pressure regulator and filter for longevity |
This component breakdown clarifies how parts affect delivery and water conservation, guiding homeowners in planning a system.
For homeowners considering installation or evaluation of a drip system, professional assessment can optimize zone design and controller selection. Northwest Landscape Supply can provide local referrals and regional insight for system evaluation; contact them to schedule a site assessment and discuss options.
Localized Drip Irrigation System Design and Installation
The system was designed to deliver water required by the crop intermittently (i.e. specific amount at a specific interval of time). The system was constructed exclusively from locally available materials. The emitter was punched using 1mm diameter needle on a 20m long lateral. It was designed for tomato crop (Lycopersicum esculentum spp) with irrigation interval of five days. The test of the system shows that the water application was adequate; the pump used for the operation of water lifting was 2″ water pump. The result of system’s test revealed a nice outcome by wetting the area situated on the lateral at 60cm to one another at almost same application rate. Emitter
Design, Construction and Installation of Localized Drip Irrigation System, MD Zakari, 2013
What Are the Benefits of Drip Irrigation for Water Conservation?
Drip irrigation reduces water use by delivering moisture directly to the root zone, which decreases evaporation and runoff and often yields water savings ranging from 30% to 60% compared to overhead sprinklers in many landscapes. Targeted delivery reduces wet foliage, lowering disease pressure and weed germination, and improves nutrient uptake because fertilizers stay near roots instead of washing away. Drip systems also support precise zone control, enabling different plant groups to receive tailored volumes and schedules that reflect their transpiration rates and soil types. Over time, these efficiencies reduce irrigation bills and align with water-smart practices favored in water-restricted regions.
How to Set Up a Residential Drip Irrigation System
Setting up a residential drip system starts with a simple plan: map zones by plant water needs, measure distances, and choose tubing, emitters, and a controller that match pressure and flow requirements. Install a backflow prevention device, pressure regulator, and filter at the water source to protect the system; run mainline tubing to zones, add laterals and emitters at each plant, and then pressure-test the system to check for leaks and ensure even emitter output. Adjust emitter flow rates and schedule run times based on soil type and seasonal conditions, and flush lines periodically to prevent clogging from sediment. Regular winterizing and end-of-season checks preserve system performance and extend component life.
How to Check Soil Moisture: Tools and Techniques for Proper Plant Hydration
Checking soil moisture reliably prevents both overwatering and underwatering; combine simple tactile tests with tools to get objective readings and tailor watering to plant needs. The finger test provides a quick assessment of the top soil layer, while moisture meters give more precise depth readings and can be used to log trends across zones. Consistent morning checks after evaporation subsides produce the most comparable results, and testing at the same depth used for your species—1–2 inches for seedlings, 2–3 inches for houseplants, and deeper for trees—helps convert readings into action. Monitoring over time reveals how soil type and microclimate affect drying rates and helps you refine schedules for long-term water savings.
The following list outlines stepwise actions for common moisture checks and recording.
- Perform the finger test at recommended depths for each plant category to sense dryness.
- Use a moisture meter probe inserted to root depth and record readings over several days for patterns.
- Weigh containers or mark soil lines to estimate volume loss and watering needs.
Documenting results builds a reliable schedule and reduces guesswork, making watering more precise and effective.
How to Use the Finger Test and Moisture Meters to Measure Soil Moisture
The finger test is straightforward: insert a finger to the recommended depth (1–2 inches for seedlings, 2–3 for houseplants, deeper for shrubs) and assess if the soil feels moist, slightly damp, or dry; if it feels dry at the target depth, water. Moisture meters give a numeric or color-based reading—learn your meter’s calibration and test spots near the root ball rather than just surface soil for accuracy. For consistency, test at the same time of day and in the same location relative to the plant to compare readings over time. Combining both methods gives practical confirmation: the finger test for quick checks and the meter for objective trend recording and documentation.
Why Monitoring Soil Moisture Is Crucial for Preventing Overwatering and Underwatering
Regular moisture monitoring links irrigation actions to plant health outcomes by preventing unnecessary watering that wastes water and causes root disease, while also signaling when drought stress begins so corrective watering can occur before irreversible damage. Early detection of moisture trends helps you adjust irrigation frequency and duration to seasonal shifts, soil changes, or growing-stage needs, which conserves water and supports strong root systems. Monitoring also informs landscape decisions like mulching, grouping, or re-zoning irrigation that improve efficiency. Ultimately, a habit of measurement converts guessing into data-driven management, producing healthier plants and lower water use.
What Are Water Conservation Tips for Sustainable Gardening and Efficient Plant Watering?
Water conservation in gardens focuses on retaining moisture, grouping plants by water needs, and using efficient delivery systems that reduce waste and improve plant health. Mulching, soil improvement, strategic plant selection, and scheduling irrigation for early morning hours reduce evaporation and make each gallon count. Rainwater harvesting, smart controllers, and zoning are additional levers that help homeowners match water delivery to plant needs while complying with local restrictions and managing costs. Implementing these practices together creates a resilient landscape that withstands heat and drought and supports native and drought-tolerant species.
Start with mulching and plant grouping; practical tips below show simple, high-impact actions you can take immediately.
- Use mulch to cover bare soil and reduce evaporation around plant bases.
- Group plants with similar water needs into irrigation zones to avoid overwatering low-needs species.
- Time watering for early morning to minimize evaporation and disease risk.
These small changes compound into substantial water savings and healthier plants over seasons.
How Does Mulching Help Retain Soil Moisture and Reduce Water Use?
Mulch creates a protective layer over soil that reduces surface evaporation, moderates soil temperature, and suppresses weeds that compete for moisture; organic mulches additionally improve soil structure as they break down. Recommended depths vary by planting: typically 2–4 inches for beds and 1–2 inches for containers, avoiding direct contact with woody stems to prevent rot. Common materials include bark mulch, shredded hardwood, and composted organic matter—each offers benefits in moisture retention and soil-building.
Applied correctly, mulching is a high-impact, low-cost conservation tactic that pairs well with drip irrigation and moisture monitoring.
What Are Other Water-Wise Gardening Practices for Hot Climates Like California?
In hot climates, choose drought-tolerant or native species that match the local rainfall pattern and soil, water early in the morning when winds are calm, and install smart zoning so high-use and low-use plants run on separate schedules. Implement rainwater capture where feasible to supply supplemental irrigation, and prioritize soil improvements—adding compost increases water-holding capacity and reduces irrigation needs. Group containers and beds by water needs and use efficient emitters or soaker hoses to deliver water at low pressure directly to roots. Seasonal adjustments—reducing run times in cooler months and increasing them during heatwaves—maintain plant health while minimizing waste.
These practices create resilient landscapes that thrive with responsible water use and lower maintenance demands.
For homeowners seeking hands-on assistance—including zone planning, controller recommendations, or a site assessment tied to irrigation and water-saving goals—consider contacting a local provider. Northwest Landscape Supply takes pride in our landscaping expertise, prioritizing your outdoor needs with dedicated care. Our team is composed of skilled professionals who are well-trained and certified to deliver top-notch landscaping services in the community. With years of experience in the field, we are prepared to enhance your outdoor spaces. Our primary goal is to assist you in creating beautiful and sustainable landscapes while staying within your budget. Contact us for referrals and evaluation support for system selection and scheduling.